准备工作:
已经拥有阿里云账号及已经实名认证的域名
2、免费企业邮箱申请
打开阿里云免费企业邮箱申请地址:https://wanwang.aliyun.com/mail/freemail/,点击立即开通
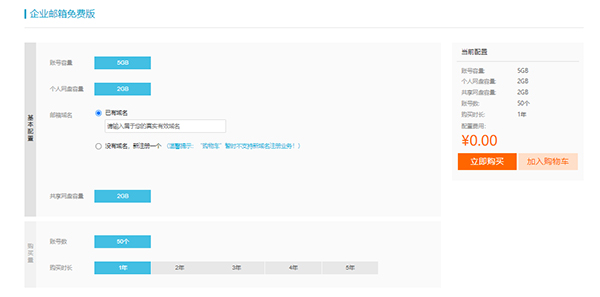
3、填写关联域名信息
填写需要关联企业邮箱的域名,点击立即购买,确认支付订单,点击支付,直至交易完成
4、申请成功,查看邮箱
在控制面板里面的企业邮箱业务栏里,就可以看到自己刚才申请成功的阿里云免费版企业邮箱。
5、解析邮箱域名
https://help.aliyun.com/document_detail/36723.html?spm=a2c4g.106555.0.0.1a5733ddpkxdnP
6、登录阿里云邮箱
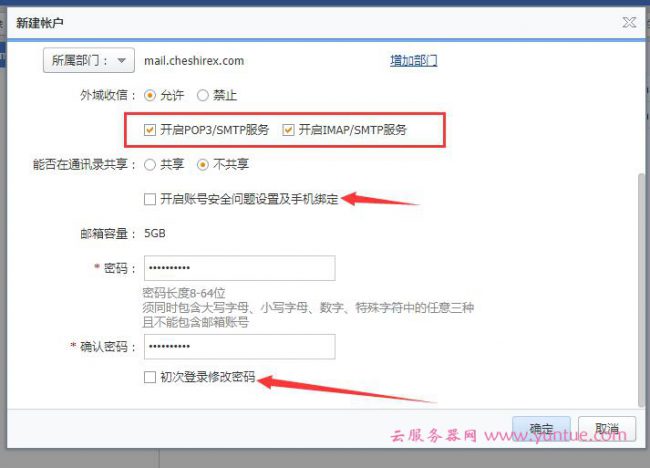
7、创建员工账户
https://help.aliyun.com/document_detail/36734.html?spm=a2c4g.438225.0.0.2f217e7acoIV8z
8、勾选开启发送邮件
wordpress
1.安装WP Mail SMTP 插件
2.开始配置
- From Email: 刚刚新建的发送地址
- From Name: 随便填
- Mailer: Other SMTP
- Return Path: 选中
- SMTP Host: smtp.qiye.aliyun.com
- SMTP Port: 465
- Encryption: SSL
- Auto TLS: ON
- Authentication: ON
- SMTP Username: 刚刚创建的员工账号
- SMTP Password: 员工账号密码
3.阿里邮箱IMAP、POP、SMTP地址和端口信息
https://help.aliyun.com/document_detail/36576.html?spm=a2c4g.607353.0.0.67881621s4QYJ3
4.测试邮件发送
完毕~